Multi-factor Authentication
As announced in Rector's Circular 23/2024 ("Rektorrundschreiben"), from June 3rd, 2024 multi-factor authentication (MFA) has been mandatory. If you have missed the setup, you can do so on site at any time (e.g. from the TU Chemnitz WLAN, in a computer pool at the URZ or at your workplace). If you encounter any problems or have questions, you can contact the URZ-Support: support@…
- Why Multi-factor Authentication?
- What does Multi-factor Authentication mean?
- Which Software is used and which „Tokens“ are supported?
- How can I enable Multi-factor authentication?
- When and where do I need the second factor?
Why Multi-factor Authentication?
In an increasingly digitalized world, online services and their secure accessibility are becoming more and more important. The Chemnitz University of Technology (TUC) also offers a variety of online services. In order to protect these services and the data stored there from unauthorized access, the Web Trust Center secures the access to them. However, the URZ is repeatedly aware of incidents in which the login credentials of individual TUC accounts get compromised, e.g. through targeted attacks such as phishing or malware. This is a major threat to the entire IT infrastructure of the Chemnitz University of Technology, as potential attackers could gain unrestricted access to all data of all online services offered by the Chemnitz University of Technology.
To counter this threat we highly recommend using multi-factor authentication (MFA).
What does Multi-factor Authentication mean?
If the verification process when logging into an online service will be done using several independent features (factors), then this is referred to as multi-factor authentication (MFA). The login with username and password alone is not sufficient anymore. You need an additional factor when using MFA. The second factor is a sequence of digits that is either valid only once or is valid only for a short period of time. Compromised credentials (username and password) thus become worthless for attackers and your own account remains protected.
Which Software is used and which „Tokens“ are supported?
The MFA solution at the Chemnitz University of Technology is based on the open source software eduMFA. The additional features (factors) for logging in are called "Tokens" there. Currently, we support three different token types:
- Software Token TOTP (authenticator app on your smartphone)
- Hardware Token YubiKey (USB stick with special security features)
- TAN List (list that can be printed on a sheet of paper)
How can I enable Multi-factor authentication?
You can enable MFA in the IdM portal. There you can add, test ("verify"), and delete your tokens. After logging into the IdM portal, you will see an overview page that lists all your enabled tokens:

In the top part you see all your enabled tokens. The description, which you have to provide when adding a token, as well as the serial number, which is generated automatically, will help you to distinguish your tokens.
Note: If you have not created any tokens, you will not be able to log into the Web Trust Center from outside the campus network or to establish a VPN connection.
Detailed information about the usage of all token types
Note: A video tutorial on how to setup this token type can be found in the FAQ section of the URZ website under 12. Multi-Factor-Authentication.
This token type is a software-based token that generates a 6-digit numerical code every 30 seconds. To be able to use this token type you need to install an authenticator app on your smartphone first. There are a lot of different apps available in the Google Playstore and the Apple Appstore.The Stiftung Warentest, a German non-profit organization for testing goods and services, tested several authenticator apps in November 2024 (see e. g. NTV Ratgeber (German)). The test revealed that the app "2FAS" is very user friendly. Another app, "FreeOTP", was the only app in the test, that did not collect any data of its users. Both apps are available in the Apple Appstore as well as in the Google Playstore. The latter app is also available in the free appstore F-Droid:
Apple Appstore: Google Playstore: F-Droid Store:After successful installation on your smartphone, you can create a new token in the IdM-Portal by clicking on Add new Software Token (TOTP). Enter a description in the corresponding input field, e.g. the name of the smartphone on which you use the token. Especially when using multiple tokens, this will help you to keep the overview:

When clicking Submit a QR code will be shown. You need to scan this code with the previously installed authenticator app. If you create the token using your smartphone, then you can click on the button below the QR code to add the token to your authenticator app directly
Note for users of an Apple iPhone: Scan the QR code with the authenticator app you just installed and not with the camera app. Apple uses its own password app by default, which does not work here. If you want to add the token using the button under the QR code, you must first change the default in your phone's settings. To do this, go to Settings → Password → Password Options → Set up verification codes using and select the authenticator app, you have installed on your phone.

Now the app will generate a new 6-digit numerical code every 30 seconds. During the validity period you have to provide this code when logging into the Web Trust Center. To ensure the correct configuration of your smartphone you can test the just generated token by clicking on the button Test token.
Note: You can now go back to the overview page or close this window. After scanning the QR code it is not needed anymore and should not be saved elsewhere. Someone with access to the QR code (e.g. an attacker) would be able to generate valid one-time passwords, too.
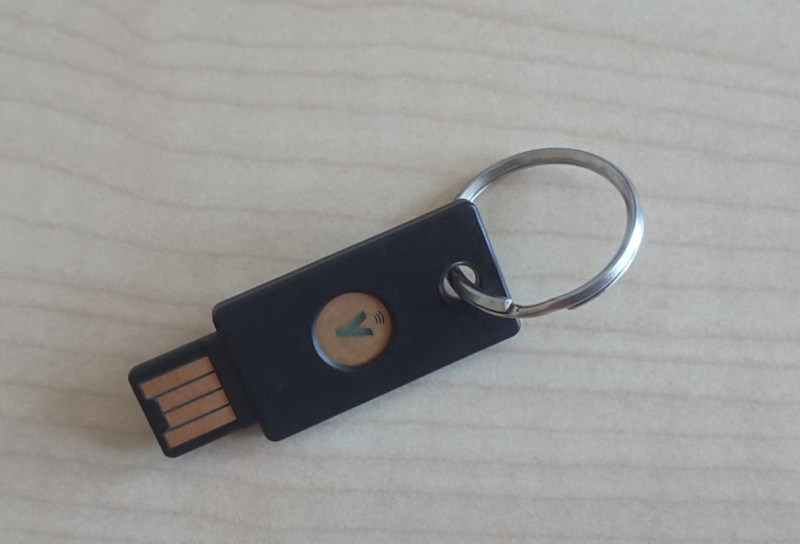
A YubiKey is a special USB stick with security features. Employees can order a YubiKey from the URZ (via "ME-Schein").
In order to be able to use a YubiKey as second factor, you have to initialize it in advance. This can be done using the tool YubiKey Manager. Maybe you need to install it manually on your PC (all systems, that are managed by the URZ, have the YubiKey Manager already installed):
- Windows: Download page of the company yubico
- Linux (e.g. Debian since version 12):
$ sudo apt-get install yubikey-manager-qt
After successful installation you can start the tool and connect your YubiKey to an empty USB port of your PC. In the tool select Applications and then OTP:

The Yubikey contains two configuration slots, that can be used for different features. You need to select the slot you want to use. Based on the selected slot, the duration of how long you have to press the physical button of the YubiKey when using it differs:
- Slot 1: 0.3 to 1.5 seconds
- Slot 2: 2.0 to 5.0 seconds
In the following example slot 1 is configured.

In the next step you have to select Yubico OTP.

Afterwards, you generate a random configuration by enabling Use serial and clicking the two Generate buttons:

Before clicking on Finish to write the configuration to the YubiKey, you have to switch to the IdM-Portal and select Add new Hardware Token (Yubikey). In the input field Secret Key you have to copy the Secret Key from the YubiKey Manager. In the input field below you have to enter a suitable Description:

To finish the configuration, you have to click on Submit. Afterwards, you have to go back to the YubiKey Manager and click the Finish button. When you are now asked for a one-time password, you can insert it into the corresponding input field by clicking on the button of your YubiKey. To ensure the correct configuration of your Yubikey you can test the just generated token by clicking on the button Test token.
Note: The YubiKey simulates a keyboard. After entering the string (one-time password), the YubiKey "automatically" confirms it by simulating the Enter key ↵.
A YubiKey is a special USB stick with security features. Employees can order a YubiKey from the URZ (via "ME-Schein").
In order to be able to use a YubiKey as second factor, you have to initialize it in advance. Next to the above mentioned tool YubiKey Manager, you can also use the tool YubiKey Personalization Tool. As this tool is not under development anymore, we recommend using the YubiKey Manager. On systems where the YubiKey Manager is not available until now, you can still use the YubiKey Personalization Tool. Maybe you need to install it manually on your PC (all systems, that are managed by the URZ, where the YubiKey Manager is not available until now, already have the YubiKey Personalization Tool installed):
- Windows: Download page of the company yubico
- Linux (e.g. Debian until version 11):
$ sudo apt-get install yubikey-personalization-gui
After successful installation you can start the tool and connect your YubiKey to an empty USB port of your PC. In the tool select Yubico OTP and then Advanced:

The Yubikey contains two configuration slots, that can be used for different features. You need to select the slot you want to use. Based on the selected slot, the duration of how long you have to press the physical button of the YubiKey when using it differs:
- Slot 1: 0.3 to 1.5 seconds
- Slot 2: 2.0 to 5.0 seconds
In the following example slot 1 is configured. Select it in the tool and generate a random configuration by clicking the three Generate buttons:

By clicking on Write Configuration the YubiKey is configured. The tool will offer you to save a log file, which will contain the configuration.
Note We recommend to cancel this saving process. Just like the QR code for TOTP tokens, an attacker could use this configuration to set up his own YubiKey which then could generate valid one-time passwords, too.
Now you can switch to the IdM-Portal and select Add new Hardware Token (Yubikey). In the input field Secret Key you have to copy the Secret Key from the YubiKey Personalization Tool. In the input field below you have to enter a suitable Description:

By clicking Submit you enable your new token. When you are now asked for a one-time password, you can insert it into the corresponding input field by clicking on the button of your YubiKey. To ensure the correct configuration of your Yubikey you can test the just generated token by clicking on the button Test token.
Note: The YubiKey simulates a keyboard. After entering the string, the YubiKey "automatically" confirms it by simulating the Enter key ↵.
This is a list with 100 valid one-time passwords. In general this list should only be used as backup. In case you have a malfunction with your smartphone or you lose your Yubikey, you can use a password from your TAN list to log into your account and setup a new token. Nevertheless, the TAN list is also suitable for users, that do not have a smartphone or Yubikey or do not want to use them as token.
To generate a new TAN list you have to go to the IdM-Portal and select Add new TAN list. Then type a meaningful Description into the corresponding input field, e.g. the location where you will keep the TAN list:

By clicking Submit you enable your new token and the list with the one-time passwords will be shown. With the button Print you can print your list directly on a sheet of paper:
i
When you are now asked for a one-time password, you can select an arbitrary password from the list. To keep the overview about not used password, we recommend to use the passwords one after another and to cross out already used passwords. If you want you can test your generated TAN list by clicking on Test token. Keep in mind that you have to cross out the used TAN afterwards as it will not be valid anymore.
Token Management
When you already have set up one or more tokens, they will be shown on the overview page in the IdM-Portal. If e.g. your smartphone is broken or you have lost your YubiKey, then you can delete the corresponding token from the list. Afterwards the token can not be used as second factor when logging into the Web Trust Center or to establish a VPN connection. The Serial Number as well as the Description will help you to distinguish the different tokens. If you are still not sure, you can test the different tokens via “verify”.
When and where do I need the second factor?
You will need your second factor when you are outside the campus network and want to login into the Web Trust Center or when you want to establish a VPN connection. Then you need to enter, additionally to your username and password, a valid one-time password. If you have enabled more than one token for your account, you can enter a valid one-time password from an arbitrary token. You can find more information on the linked pages. If you are inside the campus network (WLAN, cable network, or already have an established VPN connection), then you do not need the second factor.